Saving money is important for any business. It’s not that, as business owners, we are cheap. It’s that, that money could be put to better use. You know, like for things that generate more money. So, a few years ago I put a series of blog posts on several photos hacks you could use in your photography. I decided to condense those posts about photography hacks into one post. I hope you find these helpful.
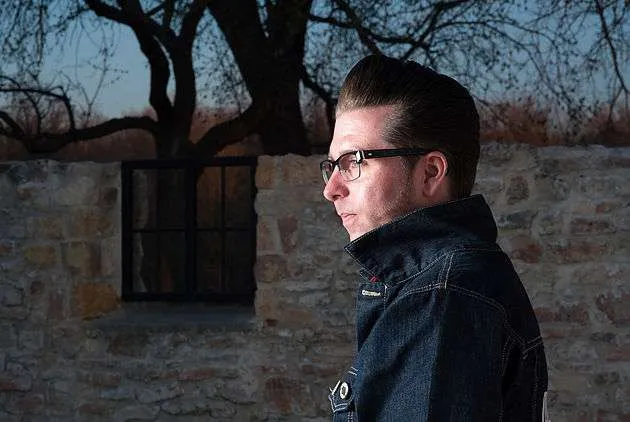
Creating a Night Portrait During the Day
Photographing a nighttime image during the day can create a very dramatic effect if executed properly. To accomplish this effect you must use lighting to overcome the sun. In this photographic scenario, you will be properly lighting your subject and under-exposing the background.
What You Will Need:
1 Portable Strobe ( I use Elinchrom RX Lights)
1 Portable Battery Pack (I use Paul C Buff Vagabond Mini Battery Packs)
1 Light Stand
1 Softbox ( I use Elinchrom Rotalux Softboxes)
2 Radio Flash Triggers ( I use Pocket Wizard Plus III triggers)
1 Flash Meter (I use Sekonic)
Now, this is a bit different than my other posts because this requires a fair amount of gear. If you want to do this portrait on a budget you could use a speed light, but get it off the camera.
The key to executing this properly is under-exposing the natural environment by about 2 stops to get a darker more saturated effect. It is usually best to photograph later in the day as it is far easier to overcome the sun.
Step one
Meter for the natural environment and underexpose by EV-2 (exposure value minus two). Next, you will meter your strobe on your subject for proper exposure EV 0. Your shadows ideally should be metered for EV -1 to retain detail, but minus 2 is also acceptable.
Depending on your camera your maximum shutter speed should be no greater than 1/200th of a second to avoid cutting off from your lights.
Step two
You will need to properly manage your aperture to get a perfect balance. It is a delicate scenario of managing your strobe power, the distance of your light, and your aperture to overpower the sun. Higher powered lights and smaller apertures will make this easier.
Step three
Once you achieved the proper exposure values shoot away. The more you know light and the more experience you have the easier this becomes. Usual setup time can take about 5 minutes if you are well versed in lighting. If you not it will take time but eventually it gets easier.
Someone Is In Your Way
So you have lined up the perfect shot only to have someone walk right in front of you at the perfect (or worst) moment. Having people in your way when shooting an event can be a constant annoyance for any photographer. You can get frustrated or you could do what any good photographer would do and handle it.
Solution 1:
Use that observer as a part of your framing. When you add an observer into the mix you are creating a photograph that tells a story. The photograph becomes more interesting. There is also an added context of the person who views the photograph feeling like they are a part of it themselves.
Solution 2:
Be careful with this one, I take no responsibility. If you absolutely have to get by and this does happen. First yell excuse me as you are walking up, if that and only if that doesn’t work you do this. Poke them in the right shoulder with your finger. They will turn to the right. You walk by through the gap created to their left. You just keep moving, yelling, and poking through a large crowd.
So much of event photography is just dealing with the scenarios you are presented with and thriving in them. You have to react in seconds (often less). After all, you can’t publish excuses.
Flash Speedlight Modifier
One of the simplest and most effective ways to achieve flattering photos with a Speedlight is to bounce the flash. You usually never want to directly illuminate the subject as the light is harsh unless, of course, you prefer “The Deer in Headlights Look”.
What you will need:
-
1 White Business Card (the more reflective the better)
-
1 Rubber Band (optional)
Generally on Nikon speed lights, there is a space between the wide angle diffuser and the strobe and the top of the flash gun. Simple solution: use a business card.
Step 1:
Point the flash head upward
Step 2:
Fold over the bottom corners of the card in the portrait aspect several times. Repeat this back and forth until you are able to remove the corners.
Step 3:
You should now be able to place the card in the slot between the wide-angle diffuser and the strobe itself. If your Speedlight does not have this you can use a rubber band instead.
Light Stand Weight
If you are a photographer who shoots on site a lot with studio lights, you are probably well aware of how much your gear weighs. You are also well aware when working with lights in an outdoor location of how easily they like to topple over. One swift wind and there goes your $1000 light.
Now for me, I’ll be damned if I’m going to pay an exorbitant fee for a glorified light stand weight. Especially one that is simply a bag of sand. Never mind carrying a bag of sand to jobs.
The easiest solution: a 4-liter jug of water (or 1 gallon for our American friends). Fill the jugs you need with water before the gig. Empty them when you are finished. Easy and cheap. Plus if you are thirsty after a long photo shoot they also come in handy.
No Grad Filter
So you managed to forget a grad filter and what you are shooting requires one. You could HDR the image, but that’s not the look I want.
What you will need:
Anything that blocks light. Like your hand or a card.
Tripod (Don’t even bother without one)
A cell phone with a stopwatch will help.
Solution:
You will want to do a long exposure in order to achieve this. Stop down to at least f16 or more. Your ideal exposure time should be about 2 seconds or more if you can do it.
First, you want to meter for the sky. Say you’re lucky and it is one second (this won’t happen). Next meter for the land, subject, or whatever. Perfect, it meters for 2 seconds (what an ideal scenario).
Next, you are going to block the area of the sky for a period of time while you take the exposure. Following our perfect scenario, you will make a 2-second exposure in total. Setup with your clock in hand and place the card over the sky portion with a slight overlap of the land. Cover the area for the first 1 second of the exposure. At that point move the card upwards in a sweeping motion, removing it from the image area (this will help create a more natural gradation).
Now, this is not a proper technique by any means. It will take a lot of tries before you are able to get acceptable results. But if you are stuck it can produce great results with a lot of patience, of course. Heck, pixels are free anyway.
Binder Clips
I just love butterfly clips. They make my job so much easier in so many different ways. Below are a few of the applications you can use these great inventions for.
Prop Up Product
Often you will want to put a slight angle on the product you are photographing to get a more flattering angle full of depth. Stick one of these underneath the product.
Attaching Gel Filters
You can use these to quickly attach gel filters to your filter holders especially useful if you are in a pinch and speed is essential.
Model Releases
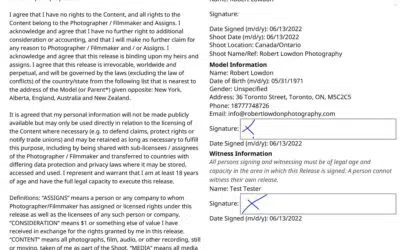
Pretty standard. Always helpful to have a stack of model releases in your bag that aren’t flying everywhere.
Support For A Fill Card
You can use binder clips for simple support for a small fill card when in need. Simply place the card stock in the clip. Fold it backward. Done.
Photo / Press Passes
You can easily clip a press pass onto a shirt or jacket pocket. This way they are easily seen and they are not flipping around like a lanyard (I hate that).
Reflector
A lot of people tend to think that you need some special photographic reflector. The fact is you don’t and often a simple piece of paper will do the trick to get a proper fill for your image.
What You Will Need:
White Paper (The thicker the better)
For this, you simply use the paper as close to the subject as desired to create flattering fill light. You are simply bouncing light to either lessen or eliminate a shadow from your subject. Remember light falloff is exponential. By paying close attention to your subject you will be able to observe the effect that is being created.
Gaffers Tape
Gaffers tape is extremely useful to have with you for any on-site photo shoot. It has about a million uses and is non-reflective (doesn’t transmit light). But for some reason, gaffers tape seems to be extremely expensive for what it is.
There is a solution, and I’m sure many fellow Canadians would be aware of it. Drum roll please; Hockey Tape.
As far as, I can tell Black hockey tape is almost identical to gaffers tape. At $3 bucks a roll you really can’t go wrong. You can buy a case of 36 rolls for $64! One roll of gaffers tape is usually about $32.
Expert Tip: When on-site you should be taping down your electrical cords to eliminate any trip hazard. First off It’s professional and never mind all the legal ramifications if someone trips and falls. More so, it is just common courtesy, no one wants to be responsible for someone getting hurt because of negligence.
Snoot
Let’s face it snoots can be expensive. Well, basically any light modifier is. A simple way to create a snoot effect can be easily created with common household items:
What You Will Need:
1 Roll of Fabric-Based Tape
1 8×12 Piece of Reflective Poster board Paper (Silver is better but white is often great)
Step One: Roll the paper into a tight cylinder shape and hold.
Step Two: Firmly grasping one end of the cylinder place pieces of tape on the interior folding over to cover the exterior of the cylinder.
Step Three: Release the opposite end of the cylinder creating a cone shape to the desired diameter of your strobe light and place tape to hold at that diameter. The open end should fit snugly with the end of your light source preventing any light leaks.
Step Four: Place four pieces of tape attaching your newly constructed “snoot” to your light source.
You have now created a cheap snoot that you can use when in a pinch.
Conclusion
I hope these simple photo hacks have helped you to save some money or just find simple solutions to common problems. If you have any to add, feel free to add them to the comments section at the bottom.


0 Comments